How To: Change the Names of Your SMS Tones
Hey, everyone. Rorypiper, again. Got a great tutorial this week, that will show you how to change the names of your SMS tones.
Typically, when you download new SMS tones from Cydia, and apply them in Winterboard, you still have the same stock names of the tones, when you go into Settings -> Sounds -> New Text Messages. With this hack, you will be able to have those names, reflect the actual SMS tones you have applied, in Winterbaord.
You will, of course, need to have a jailbroken device, with Winterboard installed, for this to work. You will also need access to your root folder’s, via SSH, or USB. On my Mac, I have always used Filezilla for SSH, and over the past year, I have been using Disk Aid, to access the root folders, via USB. For this tutorial, I’ll be using Disc Aid. If you are new to the jailbreak community, this might be a little involved for you, but if you are familiar with the root folder heirarchy, then you should be okay.
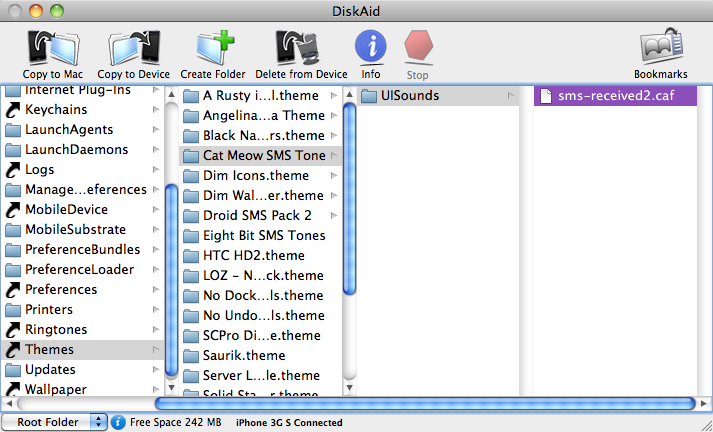
First you need to decide what SMS tone you want to see the name of, in the Settings App. Whatever tone you pick, make sure it DOES NOT replace the 1st stock tone, “Tri-tone”. We cannot change the name of this one. Go into your root folders, and navigate to Library -> Themes. Go into the folder of your SMS tone, “Your tone” -> UiSounds. You should see one or more files in there, called “sms-received”, and they will be numbered 1 through 6 (if there are that many in the folder). We can only rename 2 through 6, so if your tone is called “sms-received1”, rename it. You will probably have to copy the tone to your computer, to rename it, then copy it back to the same folder on your device. I’m going to use my “Cat Meow SMS Tone”, and have it replace the 2nd stock tone, “Chime”.
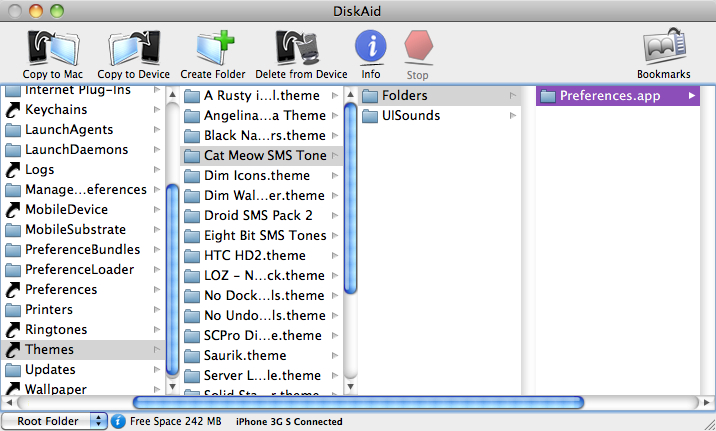
With that sorted out, let’s go back to your desktop. We need a new folder heirarchy to go in your theme’s folder. Make a new folder and name it “Folders”. Inside that one, make another and name it “Preferences”. Inside that one, make another, and name it “en.lproj”. Inside that folder is going to be a file called “Sound.strings”. We’ll create that file, next. Your folder heirarchy should look something like this:
To make the Strings file, you just need a simple text program. Notepad on Windows, or Text Edit on Mac will do just fine. Open a new document, and type the following, including all quotations and punctuation:
“ALTERNATE_1” = “Cat Meow”;
Of course “Cat Meow”, will be replaced with what ever your tone is called. If you’re renaming more than one tone, you can do it all in the one string file. Just replace the number. You can have up to 5. Save the file to your desktop, naming it “Sounds”. Now change the extension of the file to “.strings”. Depending on your system, you may need Administrative rights, to do this. Once that is done, move the file into the “en.lproj” folder, we created earlier.
Okay, we’re getting there! One last step, before transferring all this to your device. Navigate to the “Preferences” folder, we created earlier. We need to add an extension to this folder. Click the folder, to rename it and add “.app” to the folder name. You will probably be asked if you’re sure you want to do this. Click “Add”. Now your floder should look something like this:
Now that your new folder set is finished, we need to get it on your device. On your iPhone, in the root folder, navigate to Library -> Themes -> “your theme”, (in my case Cat Meow SMS Tone), and copy the entire folder set to this folder. You SMS tone’s folder should now have 2 folders in it: “Folders” and “UISounds”.
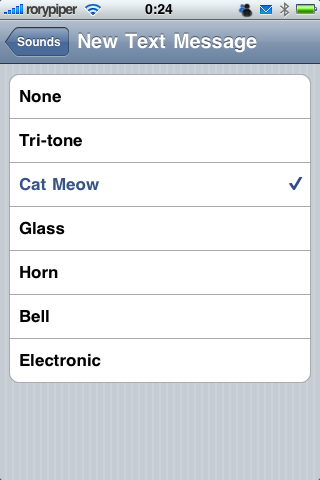
Respring your device. You can do this in SBSettings, if yoou have it installed, or go into Winterboard and deselect/select your SMS tone, and exit Winterboard. When your device comes back, go into Settings -> Sounds -> New Text Message, and you should see the name of your tone on the list.
That’s it! I hope I didn’t just break your brain! You can do this for all your tones, if you want. Just copy/paste that new folder set you created, and just change the name in the string file. For a tutorial on creating SMS tones, you can check out an older post right here, at iPhoneinCanada, or head over to Green Candy.
Go ahead and follow me on Twitter: @rorypiper. See you next week!


