**Looking to protect your iPhone? Get military-grade protection with the InvisibleShield!**
Jeez, just when you thought updating your iPhone to 1.1.3 firmware couldn’t get any easier, it gets even better with the recently released, iJailbreak! This 1.1.3 firmware update/jailbreak is possible without a computer, as the entire process takes place online via WiFi! That’s right–you can update to 1.1.3 right over the air!
This update is only for jailbroken 1.1.1 or 1.1.2 iPhones or iPod Touches (OTB 1.1.3 iPhones will not work) and will take approximately 45 minutes to complete.The entire process is through Installer and a wireless internet connection, so make sure that you plug in your AC adapter to your iPhone and ensure you have a nice, solid WiFi connection (the faster the better).
**Warning: As with all hacks and upgrades to your iPhone, you assume ALL THE RISKS involved, and I am not responsible if you mess up your iPhone! Please, please, use common sense and only follow this if you’re sure of what you’re doing! 🙂 **
How to Update to 1.1.3 Firmware via iJailbreak and Installer
- First things first, go to Settings–>General–>Autolock–>Never.
- Next, make sure that Installer has been updated to the latest version, as well as the BSD Subsystem.
- Launch Installer and add the following source: http://ijailbreak.com/repo.plist (Sources –> Edit –> Add –> http://ijailbreak.com/repo.plist) and then “refresh” your sources.
- Go back to the Install menu, and you should see a category labeled “iJailbreakMobile”. From here, you need to choose either 1.1.1 or 1.1.2, depending on which jailbreaked firmware you are running.
- Install iJailbreak and exit Installer. The Springboard should reload and then you will see the app iJailbreak. Run the program.
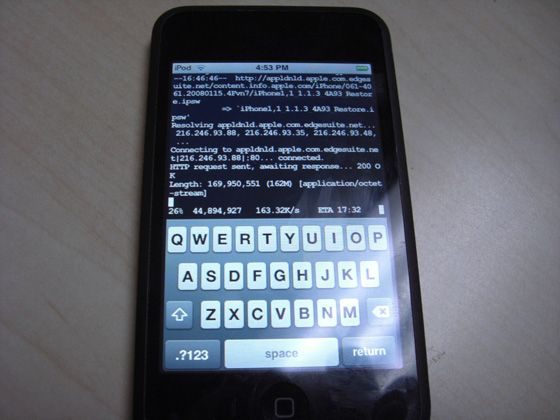
- You’ll be asked a few questions during the setup, then the install will take place. The reason it takes so long is that it downloads the entire 1.1.3 update over WiFi from Apple.
- It should take about 45 minutes, and at time it may look like it’s frozen–but let it run. If successful, the iPhone will reboot and it will be in 1.1.3 firmware.
- Once completed, launch Installer and install “Remove 1.1.3 Upgrade Data” only if you’re coming from 1.1.1, to remove the space taken up during the install.
- That’s it! Enjoy your 1.1.3 firmware!

Credit for this tutorial goes to 13 year old AriX (send a donation if it works for you) and CrunchGear.
This has got to be the easiest firmware upgrade ever…however, I for one, am not going to upgrade just yet. Why? Well, there are many problems and bugs users have run into with 1.1.3, such as increased dropped calls and right now I don’t have the time to deal with them–as I need my iPhone for work!
So experimenting with an upgrade is not on the agenda for me right now. I am happy and headache-free with my iPhone on 1.1.1 firmware. I have 3rd party apps that work and every is running smoothly–I know, you’re probably thinking I should upgrade to at least 1.1.2. But you know what they say…if it ain’t broke, don’t fix it!!! =)
If you enjoyed this post, please subscribe to my RSS feed, so you won’t miss any updates!


It can’t get any easier…. 😛 haha This is really nice and helpful for the ppl that are not familiar with updating/jailbreaking and etc. 45 min can be a while but it’s worth it if it works out lol I’m still not updating neither, to many problems yet and well, my iPhone is still an iTouch LMAO
Cool info dood!
omg dude. awesome sauce.
Problems with the above:
– Google locate on maps feature STILL wont work
– all 3rd party Apps will be lost on spring board but will exist on unistall in insller. u will have to uninstall and reinstall again… if its compatible.
-messages recieved from ppl on diffrent timeszones messes up the order in the chat screen of any conversation.
– Manny cool and fun apps dont work with this upgrade.
– manny of the new 1.1.3 features are readily available on 3rd party apps that work perfectly fine on 1.1.1 and 1.1.2
SO. personal advise… forget it… stay cool and safe with ur jailbroken 1.1.1. and ur golden… 3of the dev crew memebers are still on 1.1.1!!!
@DUSTY : get of ur ass and go buy an IPHONE NOW!!!!!
IMPORTANT:
THIS METHOD IS ONLY TO BE USED ON JAILBROKEN 1.1.2
IF U HAVE 1.1.1 !!!DO NOT!!! UPGRADE VIA INSTALLER!!!!
You can upgrade from 1.1.1 using this method, as it will give you an option of choosing 1.1.1 or 1.1.2…whereas the other update method, requires starting from 1.1.2. Hope this clarifies the situation. 🙂
Hey guys, is this method different than the 1.1.3 jailbreak/upgrade posted here??:
http://www.iclarified.com/entry/index.php?enid=611
This one is also via an Installer sourse, but it’s the same package released by the iPhone Dev Team.
This method is DIFFERENT from the jailbreak posted by iclarified. This method is completely over WiFi and is from iJailbreak.com …you can update from 1.1.1 and 1.1.2, as per the CrunchGear article!
Just upgraded from a jailbroken 1.1.2 to 1.1.3 and everything works like a charm…for now..knock on wood. Took about 15 minutes to complete with a strong battery and wifi connection.
As always, thanks for the updates and I’ll keep you posted of any problems.
Tgriff 🙂
@Samer….. yes it is the same one as posted above and you can see it clearly states that only 1.1.2 is capable of being upgraded.
@Tgriff…..dose the maps feature work??
Map function works great. Map, Satellite, Hybrid & List all working. Moved some icons around…pretty cool.
My signal strength on the phone has not changed at all either. I’ve had a few calls since and still had excellent coverage. Nothing dropped so far.
Tgriff
Has anyone tried this on a 1.1.1???
i have my doubts because this is the only site that actually is posting this method considering it is different from the one on iclarified
i tried to go to the page and it didn’t work i have a 1.1.1 iphone
I have a 1.1.1 unlocked (using AnySim) iphone. Will upgrading to 1.1.3 using the described method, affect in anyway my ability to use non AT&T sim cards? I mean…will my iphone still be unlocked after the upgrade?.
Thanks.
I have a 1.1.1 unlocked and am using it with no problems, I would like to go to 1.1.3, however I needed to update my installer to the newest one and I am not too sure how to do that? help? I am sure that is it is very easy to do but I can not figure it out.
thanks Twister
Just tried to upgrade from 1.1.1 OTB to 1.1.3 using appropriate ijailbroken app, got a warning about ‘not enough free space, delete some photos’ window near the end (I think I had about 500MB free at start), install continued, and when it rebooted, I was still at 1.1.1.
I tried it again, except the ijailbreak app just sits at the ‘#’ prompt. If I try to download it again, I get a weird loop, where I need to install BSD subsystem, and when I try t get the BSD subsytem, it gives me the same warning ‘you need bsd subsystem’ (d’ohhh)
anyone know how to reinstall the ijailbreak app, or a way for me to reset/restore back to usuable state, where I’m still jailbroken?
So far, I think the phone is still ok, everything seems to still work, except for that dumb loop in Installer.
exit installer.. and come back that happens to me all the time, it’ll say that for everything, also i’m having the samee problem when i installed it still said 1.1.1 but i’m gonna try again and i’ll repost how i make out
clarification: I had my iphone @ jailbroken 1.1.1 on Rogers, working fine before attempting upgrade, not just 1.1.1 OTB as indicated in my prev. post.
I am at 1.1.2 with turbosim, I think i’m going to wait till I hear many more positive reviews before I try. Everything works fine for me right now so I don’t want to risk it.
Awesome!!! I just updated from 1.1.2 to 1.1.3…via installer with your guidance here.. Everything works just fine…except for a few applications I needed to re-install (no biggy)…. Mail… Bluetooth…Messages…NO dropped calls….All Good!!! I love the new update 🙂 MANY…THANKS!!!
anyone else use this method without any problems? and there are still no problems?
I upgraded mine to 1.1.3 last night from 1.1.2. Everything went fine. Just leave it until it restarts manually. Took about half hour for me. Everything works fine. The locate feature in google maps seems to work, but i also installed the locateme app. One thing did go wrong though, after installing summerboard, it said you must restart your iphone for changes to come into effect, anyway i did this holding the home and sleep button, this put my phone into recovery mode where it shows an icon to connect to itunes. This is where itunes wants to restore it. I found a guide saying just open ibrickr and it will put the phone back to normal which it did. Everything works good. Is a good method of updating to 1.1.3. Some of the programs don’t wont from installer, guess they haven’t been updated yet.
protocol just redo it, i did and it’s working fine now
Just wondering if this upgrade will keep the phone unlocked or will we need to unlock again through installer?
i just upgraded from a 1.1.1.
the update process looked alright, but when the phone restarted. A connect to itunes icon appeared. this icon keeps showing when i restart the phone. anyone else get aroudn this issue?
please help
thanks,
It can’t get any easier…. 😛 haha This is really nice and helpful for the ppl that are not familiar with updating/jailbreaking and etc. 45 min can be a while but it’s worth it if it works out lol I’m still not updating neither, to many problems yet and well, my iPhone is still an iTouch LMAO
Cool info dood!
omg dude. awesome sauce.
omg dude. awesome sauce.
omg dude. awesome sauce.
Problems with the above:
– Google locate on maps feature STILL wont work
– all 3rd party Apps will be lost on spring board but will exist on unistall in insller. u will have to uninstall and reinstall again… if its compatible.
-messages recieved from ppl on diffrent timeszones messes up the order in the chat screen of any conversation.
– Manny cool and fun apps dont work with this upgrade.
– manny of the new 1.1.3 features are readily available on 3rd party apps that work perfectly fine on 1.1.1 and 1.1.2
SO. personal advise… forget it… stay cool and safe with ur jailbroken 1.1.1. and ur golden… 3of the dev crew memebers are still on 1.1.1!!!
@DUSTY : get of ur ass and go buy an IPHONE NOW!!!!!
IMPORTANT:
THIS METHOD IS ONLY TO BE USED ON JAILBROKEN 1.1.2
IF U HAVE 1.1.1 !!!DO NOT!!! UPGRADE VIA INSTALLER!!!!
IMPORTANT:
THIS METHOD IS ONLY TO BE USED ON JAILBROKEN 1.1.2
IF U HAVE 1.1.1 !!!DO NOT!!! UPGRADE VIA INSTALLER!!!!
IMPORTANT:
THIS METHOD IS ONLY TO BE USED ON JAILBROKEN 1.1.2
IF U HAVE 1.1.1 !!!DO NOT!!! UPGRADE VIA INSTALLER!!!!
Hey guys, is this method different than the 1.1.3 jailbreak/upgrade posted here??:
http://www.iclarified.com/entry/index.php?enid=611
This one is also via an Installer sourse, but it’s the same package released by the iPhone Dev Team.
Hey guys, is this method different than the 1.1.3 jailbreak/upgrade posted here??:
http://www.iclarified.com/entry/index.php?enid=611
This one is also via an Installer sourse, but it’s the same package released by the iPhone Dev Team.
Just upgraded from a jailbroken 1.1.2 to 1.1.3 and everything works like a charm…for now..knock on wood. Took about 15 minutes to complete with a strong battery and wifi connection.
As always, thanks for the updates and I’ll keep you posted of any problems.
Tgriff 🙂
Just upgraded from a jailbroken 1.1.2 to 1.1.3 and everything works like a charm…for now..knock on wood. Took about 15 minutes to complete with a strong battery and wifi connection.
As always, thanks for the updates and I’ll keep you posted of any problems.
Tgriff 🙂
Just upgraded from a jailbroken 1.1.2 to 1.1.3 and everything works like a charm…for now..knock on wood. Took about 15 minutes to complete with a strong battery and wifi connection.
As always, thanks for the updates and I’ll keep you posted of any problems.
Tgriff 🙂
@Samer….. yes it is the same one as posted above and you can see it clearly states that only 1.1.2 is capable of being upgraded.
@Tgriff…..dose the maps feature work??
This method is DIFFERENT from the jailbreak posted by iclarified. This method is completely over WiFi and is from iJailbreak.com …you can update from 1.1.1 and 1.1.2, as per the CrunchGear article!
This method is DIFFERENT from the jailbreak posted by iclarified. This method is completely over WiFi and is from iJailbreak.com …you can update from 1.1.1 and 1.1.2, as per the CrunchGear article!
This method is DIFFERENT from the jailbreak posted by iclarified. This method is completely over WiFi and is from iJailbreak.com …you can update from 1.1.1 and 1.1.2, as per the CrunchGear article!
This method is DIFFERENT from the jailbreak posted by iclarified. This method is completely over WiFi and is from iJailbreak.com …you can update from 1.1.1 and 1.1.2, as per the CrunchGear article!
You can upgrade from 1.1.1 using this method, as it will give you an option of choosing 1.1.1 or 1.1.2…whereas the other update method, requires starting from 1.1.2. Hope this clarifies the situation. 🙂
You can upgrade from 1.1.1 using this method, as it will give you an option of choosing 1.1.1 or 1.1.2…whereas the other update method, requires starting from 1.1.2. Hope this clarifies the situation. 🙂
You can upgrade from 1.1.1 using this method, as it will give you an option of choosing 1.1.1 or 1.1.2…whereas the other update method, requires starting from 1.1.2. Hope this clarifies the situation. 🙂
You can upgrade from 1.1.1 using this method, as it will give you an option of choosing 1.1.1 or 1.1.2…whereas the other update method, requires starting from 1.1.2. Hope this clarifies the situation. 🙂
Map function works great. Map, Satellite, Hybrid & List all working. Moved some icons around…pretty cool.
My signal strength on the phone has not changed at all either. I’ve had a few calls since and still had excellent coverage. Nothing dropped so far.
Tgriff
Map function works great. Map, Satellite, Hybrid & List all working. Moved some icons around…pretty cool.
My signal strength on the phone has not changed at all either. I’ve had a few calls since and still had excellent coverage. Nothing dropped so far.
Tgriff