invisibleSHIELD for Aluminum MacBook Review
Remember when my iPhone 3G ended up getting an older brother? Yes, that’s right folks I finally took the plunge and switched to a Mac from a PC. I must say I am enjoying this new MacBook more and more as the days go on. Everyday I’m discovering a new feature or a new application to install.
Now, aside from the rock solid performance of OS X, what about protecting this beautiful aluminum unibody design? A MacBook sleeve you ask? Sure, of course I have one. But how about taking advantage of the invisibleSHIELD that I have on my iPhone 3G and having that same protection on my MacBook? Bring it on!
What’s Included in the Box Tube?
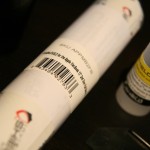
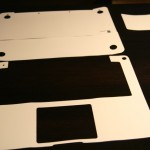
Inside the cardboard tube was the invisibleSHIELD itself, instructions, a large bottle of spray (it’s just a mild soap/water solution), and plastic squeegee card. There are cut outs to protect the top, bottom, sides, palm rests, track pad, and outer bezels of the MacBook.
Some Tried Tested and True Tips for the Perfect Install
Like I’ve shown before with my invisibleSHIELD install videos, the best tip I can give is to spray liberally on the plastic sheets along with a light mist on the MacBook itself. Yes, I know the water can damage the computer so be careful. If you get enough water going on, you can then slide and adjust the sheets to fit the specifications.
Make sure you have ample amounts of paper towel handy as you squeegee out excess water. One tip that worked was when I wrapped the squeegee tool in slightly damp paper towel. This way it’s easier to glide across the MacBook plus the paper towel acts as a sponge to soak up any excess solution.
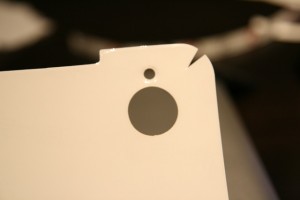
The corner installs can be tricky but I did come up with some improvisation to make it a lot easier. What I did was use scissors to cut out tiny wedges to remove excess plastic. This will ensure that your corners won’t flare up over time and make the install even easier. Take a look at my photo gallery to see see what I mean. I ended up cutting tiny slits on every single corner piece and it was dead easy.
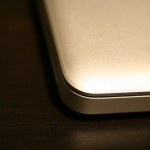
I had no problems installing the invisibleSHIELD on my MacBook and as you can see from the pictures below, you can barely tell it’s on! The only piece I didn’t install was the sheet for the touchpad as the plastic isn’t very slide-friendly. If you’re looking to protect your investment, and you have patience to install the invisibleSHIELD, you NEED this on your MacBook. Best investment ever!
Click here to visit the ZAGG website. Enter coupon code “iphoneinca” for 20% off your entire ZAGG order!! Enjoy!
If you enjoyed this post, please subscribe to my RSS feed, so you won’t miss any updates! You can also subscribe via email and have daily updates sent to your Inbox! Want more? Find out what I’m doing right now! Follow me on Twitter!
