How to Stream AVI Videos from Mac to Apple TV2 via XBMC
Do you own the latest Apple TV? If you’re not aware, an untethered jailbreak was released a while back with greenpois0n. That jailbreak was soon ported over to PwnageTool and sn0wbreeze.
The following will be a step by step tutorial on how to jailbreak your Apple TV2, install XBMC (a complete media centre solution), and stream AVI videos from your Mac to Apple TV2, within XBMC (which is also available for the iPhone).
I spent some time this weekend tinkering with my Apple TV, and I finally have the perfect setup. All of my non-mp4 videos can now be watched on Apple TV. So if you download lots, this is the dream setup you’ve been waiting for.
I only skimmed the surface of life with XBMC. There are lots more you can do, but this tutorial will focus on how to stream your downloads from your Mac to Apple TV, and watch them in XBMC over your network. I used to transfer videos to a USB stick, and watch them on my DivX dvd player. Those days are now gone.
How to Stream AVI Videos from Mac to Apple TV via XBMC
As always–proceed with caution when it comes to jailbreaking. We are not responsible should anything go wrong.
Things you’ll need:
– microUSB cable to connect ATV2 to your Mac for the jailbreak. Get one for cheap, or ask one of your Blackberry friends to ‘borrow’ theirs.
1. Jailbreak your Apple TV with either greenpois0n or PwnageTool/sn0wbreeze. I used PwnageTool to create the custom jailbreak firmware, then restored my Apple TV with it.
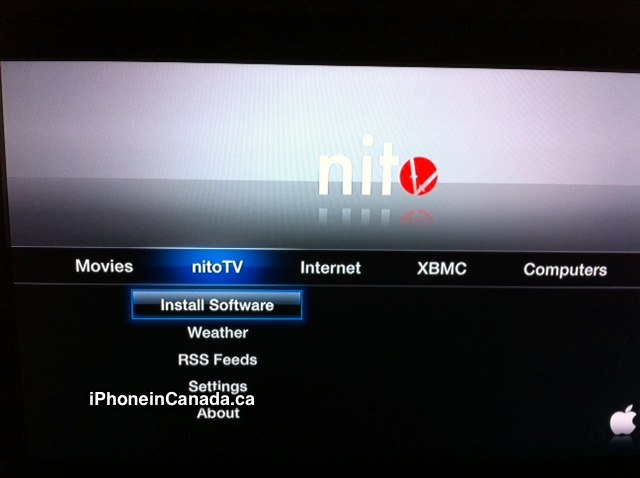
Originally, I tried to use greenpois0n, however the app kept crashing on my Mac, and the timing to execute the jailbreak took some work. PwnageTool was a lot easier. After it was all said and done, nitoTV was waiting for me to install XBMC.
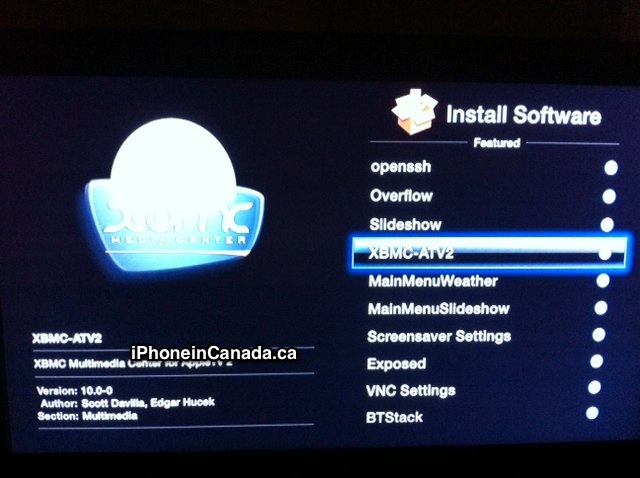
2. After your Apple TV has been jailbroken, you will see a new heading, nitoTV. Do the following:
nitoTV –> Install Software –> XBMC-ATV2
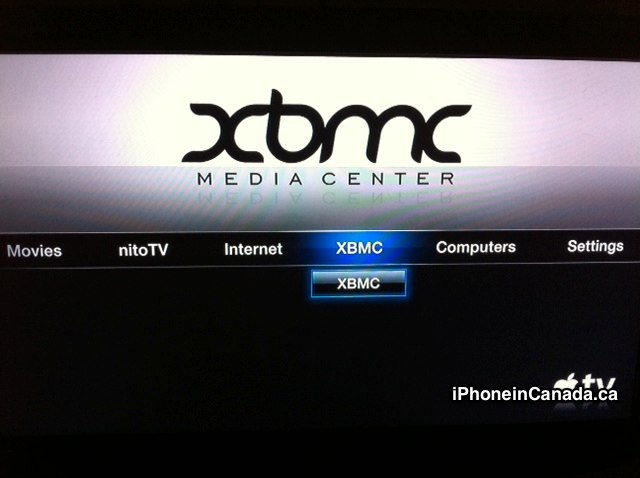
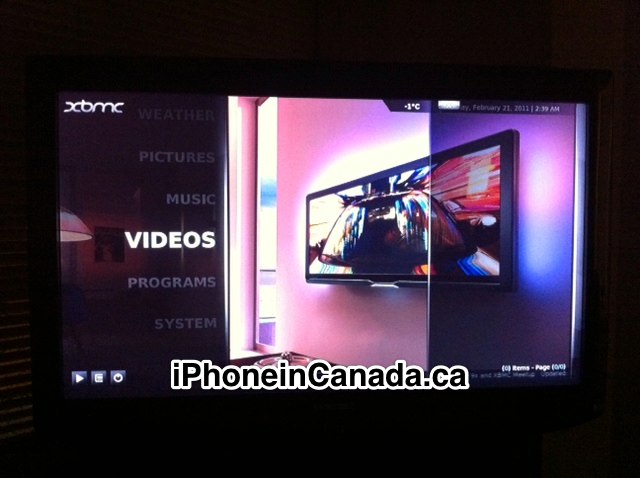
If installed correctly, you should see this new heading:
XMBC should be installed on your Apple TV menu. Now, we need to setup folders to share on your Mac.
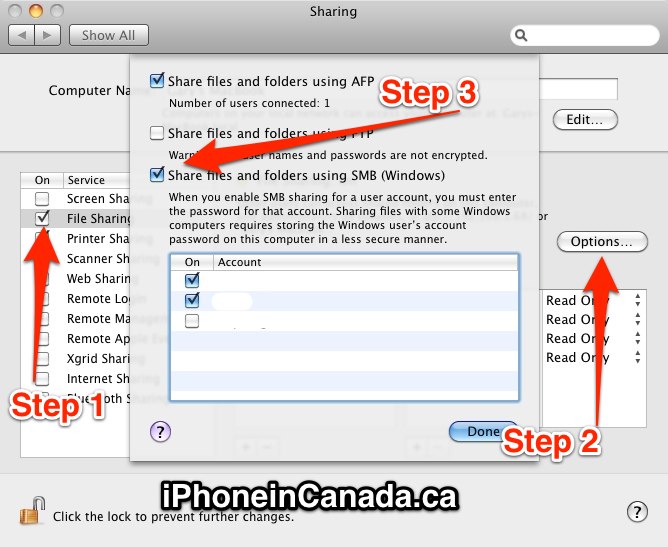
3. On your Mac, go to:
System Preferences –> Sharing –> “Tick off” File Sharing –> Options –> “Tick off” Share files and folders using SMB (Windows). Hit Done.
4. Now, you need to share the folder where you keep your media downloads (.avi/.wmv/.rmvb/.divx etc). Launch Finder. Locate your folder. Got it? Now…
Right-click the folder –> Get Info (a window will pop up) –> tick off “Shared folder”. Repeat this for any folders you want XBMC to get files from. When you enable a shared folder, all subfolders will automatically be enabled too.
Next up, setup XBMC to read your newly shared folders from your Mac.
5. Launch XBMC on Apple TV. Go to:
Videos –> Add Source –> Browse –> Windows network (SMB) –> WORKGROUP –> Your Mac –> Select your “shared folder” and confirm by pressing the left previous track button on the Apple Remote –> Name your folder whatever you want, then hit Done.
6. Everything is setup now, all you need to do is watch your media. Select your “Folder”, choose a file, and watch away. My videos in .avi format played flawlessly. I haven’t tried out 720p/1080p video yet.
Remote options while watching videos:
- Play/Pause: press and hold to bring up a drop down menu to change video/audio settings.
- Left/Right: Fast forward (one press will FF 30 seconds, or 2x-16x) or rewind
- Up/Down: adjusts volume
There you have it. The hardest part with this tutorial is probably jailbreaking the Apple TV. After that, it’s pretty simple to get things setup. Looks like the latest Apple TV has turned into one heck of an investment. Well done to the entire XBMC team!
Let me know how this Apple TV 2/XBMC tutorial works out for you in the comments!
[iluvatv]
