
How To: Clean Install OS X 10.10 Yosemite [Step-by-Step]
Last week, we showed you how to keep a physical copy of your Mac App Store digital download of OS X 10.10 Yosemite in the form of a bootable install USB drive, which comes in handy if you want to do a clean install of the operating system. Now, we’ll show you how to perform a clean OS X Yosemite install on your Mac in the following step-by-step guide (via OSXDaily).
Make sure you backup all your data before proceeding as the process requires formatting the Mac hard drive. Also, keep the OS X Yosemite bootable installer drive handy before you begin.
Step 1:
Insert your OS X Yosemite bootable USB drive into your Mac and reboot the system.
Step 2:
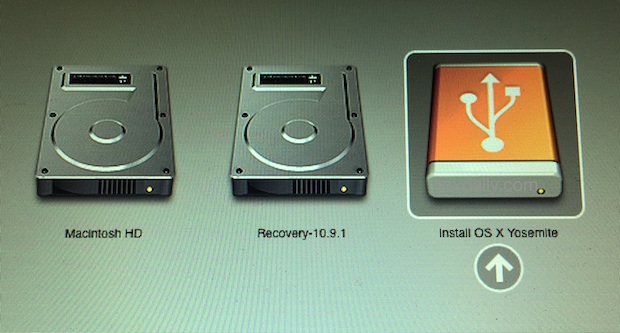
While rebooting, hold down the Option key till the following boot selection menu appears.
Step 3:
Select “Install OS X Yosemite” as the drive to boot and hit Enter.
Step 4:
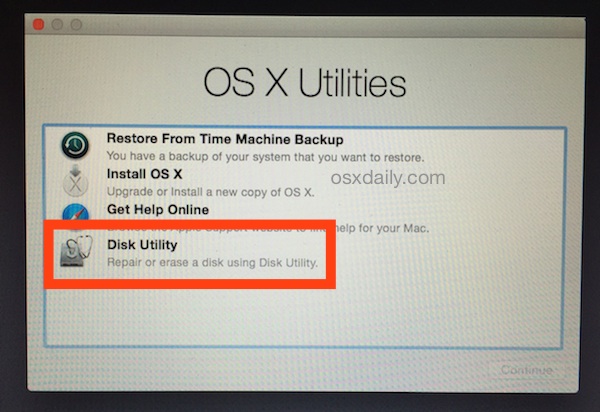
Now you’ll be presented with the “OS X Utilities” screen. Select “Disk Utility”.
Step 5:
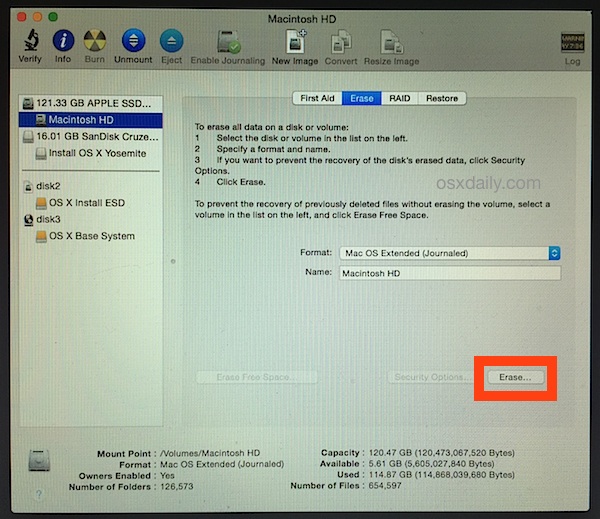
Choose the hard drive or partition from the left side menu which you want to perform a clean Yosemite install, and then select the “Erase” tab. Choose the Format type as “Mac OS Extended (Journaled)”, name the drive (e.g. Mac OS) and then click “Erase”.
Step 6:
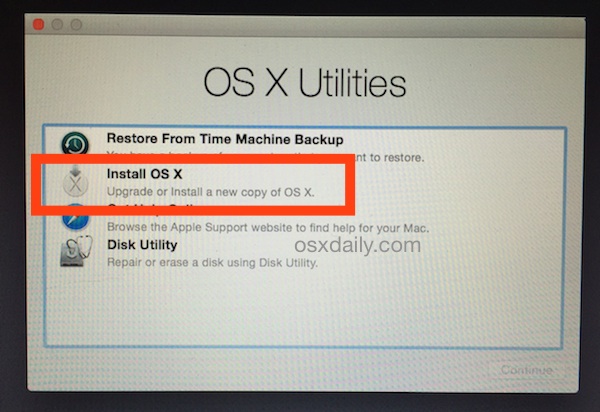
Once the drive has finished formatting, quit Disk Utility to return to the OS X Utilities menu and select “Install OS X” as shown below.
Step 7:
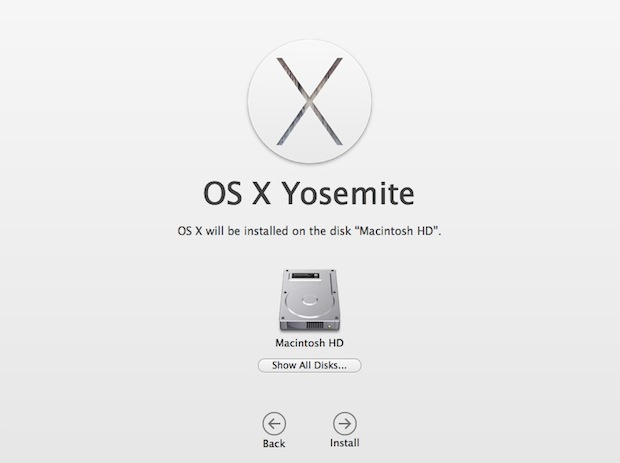
Finally select the freshly formatted hard drive / partition to set as the destination for the fresh install of OS X Yosemite. Simply follow the onscreen instructions to complete the install.
That’s it, enjoy!
If you have any questions, feel free to ask in the comments section below.

